Monday, July 27, 2015

"English Rose Garden" papers - Meg's Garden

Hi Crafty Bloggers, thanks for stopping by, 
Today I have a few projects I created with the
new release papers called the English Rose Gardens papers 
and all the wonderful embellishments, that are all from 
Meg's Garden website
 I created a card and also transformed a little box and inside this box I created 4 little note cards, decorated with lots of goodies from Meg's Garden website.

First is a card,
"Be-YOU-tiful" card by Adriana Bolzon


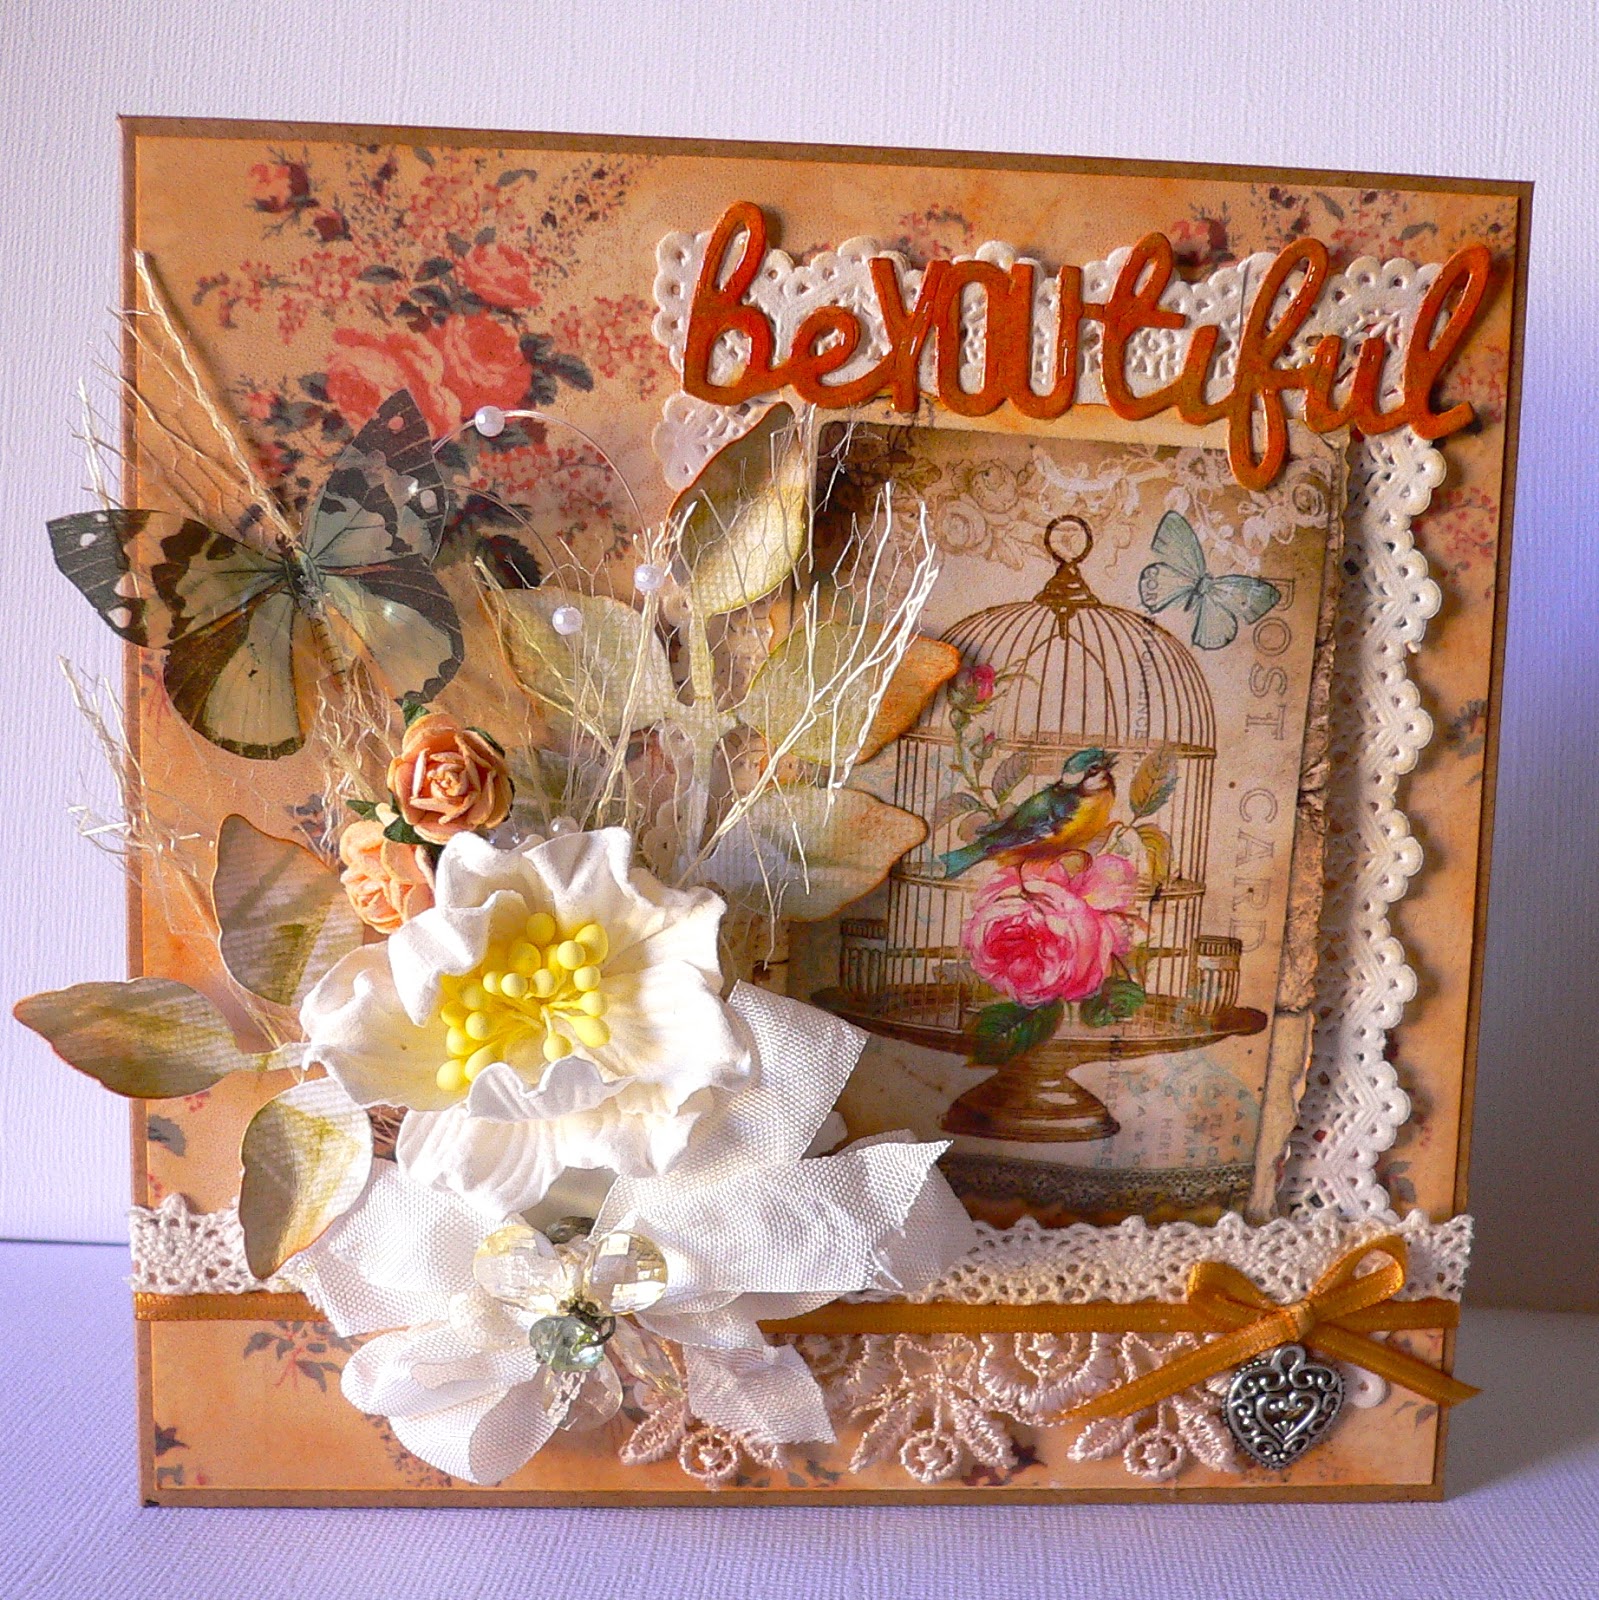
all the yummy Materials are all from Meg's Garden website.

 "Roses & Lace" paper P6428
English Rose Garden cut and create paper P6434
Leaf & Foliage paper P6430


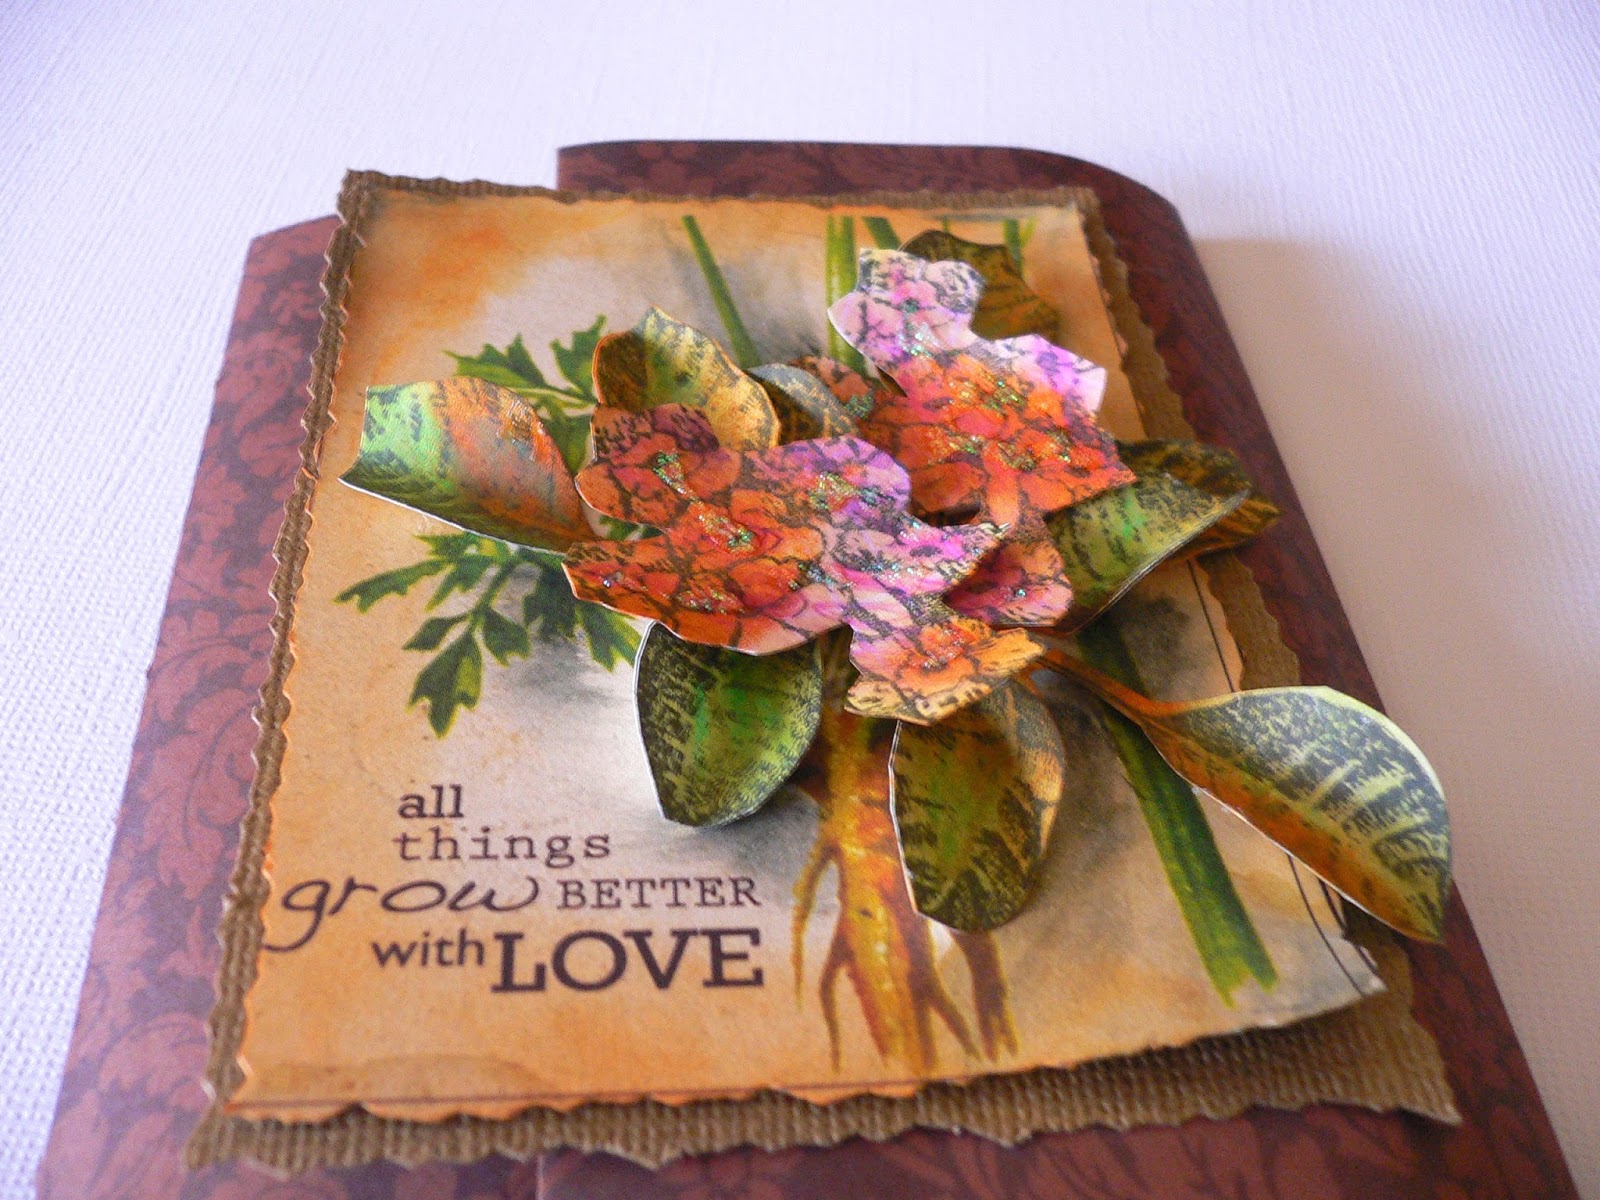
I cut out one of these images at the bottom and adhered to my card.


Other materials from Meg's Garden website
Paper doily square
Azaleas paper flower
Butterflies transparency Tr015
Cream mini rose paper flower
Skeleton Mesh - Cream
Silver Heart charm
Lace
Ribbon and Seam Binding ribbon

My Next little project is a little box, it once had some yummy chocolates inside, unfortunately everyone at home ate them….. hmmm….

 I covered the outside and sides of the box with 

 "Roses & Lace" paper P6428


and I also decorated the top of the box. With Paper doily small circle 
Paper flower , Butterflies transparency Tr015
AND Silver diamond trim


and then made 4 little gift cards
all decorated with Meg's Garden embellishments.

Here are the 4 little cards that are inside this lovely box.


Materials used all from Meg's Garden website.
 "Roses & Lace" paper P6428
Leaf & Foliage paper P6430

Paper doily square & Small round doily
Azaleas paper flower & apply blossom flowers
Butterflies transparency Tr015
Ribbon and Seam Binding ribbon
Silver Heart charm
Lace
Silver diamond trim


Please check out all the wonderful products 
and see all the design team members inspirational work at


Until next time….Bye for now, Cheers Adriana XX

Wednesday, July 22, 2015

Vintage Christmas Accordian Card

Hello there everyone, Adriana here today and I have 
I have created a special Christmas card with the new release 
Christmas Emporium papers C0724553 from  
 Couture Creations.

I love anything Vintage, and Vintage photos are my favourite images
to craft and play with. This collection has a sheet of Ephemera Christmas vintage  postcard images and also there is an Ephemera Chipboard pack C0724554 with Sentiments, just perfect for your Christmas cards or projects.


This is my accordion card, created with two square 15cm x 15cm cards adhered together, I used Kraft card stock for the base.
I trimmed 2 sheets of christmas papers for the base and adhered into
the centre of each card face (6 card faces)


I Decorated each side of the card with vintage photos and fussy cut papers.
All together there are 5 other sides and the front to decorate.


Front of card - Cut out some holly leaves and die cut poinsettia's flower, edged with Glitzing Glitter C0721971 Crystalina
Placing 3D foam tape or dots underneath "Merry Christmas" sentiment sign.


Side no. 2


I matted all the vintage image with some cream card stock and place photo corners on each corner of the photos. Fuzzy cut a small wreath and cut out the words "Merry Christmas"and adhered to the wreath.


Side no. 3

With some Kraft card stock I cut out "Vintage signs" Nesting die C08723956
Cut out the rectangle words frame with sentiment.
Fussy cut bird and holly leaves.


Side no. 4

Fuzzy cutting the holly and bird from christmas papers.


Again I matted the vintage image with some cream card stock and place photo corners on each corner of the photos. Inked some ID chipboard word "remember" with red ink pad.


Side no. 5 
Fuzzy cutting the holly from christmas papers.
Again I matted the vintage image with some cream card stock and place photo corners on each corner of the photos. Inked some ID chipboard word 'together.


Side no. 6

With some Kraft card stock I cut out "Vintage signs" Nesting die C08723956
Cut out the rectangle words frame with sentiments.
Fussy cut some holly leaves.


more details of each side of card


the other side of card


Couture Creations Materials
Christmas Emporium Papers C0724553
Christmas Ephemera Pack CO724554
Sweet Accents nesting die "Vintage Signs" C0723945


Please make sure you add your email address to get the latest newsletters.

Don't forget to join 
Couture Creations FACEBOOK


for all the latest updates from Couture Creations.


Thanks for looking, have a great day...
Cheers Adriana xx:)


Sunday, July 19, 2015

Australiana Diecuts - Couture Creations Mag issue #9

Hello there everyone, 

Very cold here at the moment, hope you are staying nice and warm.

I am sharing some cards and a layout that I have created 
using some of the new 
release Australiana collection, by Ultimate Crafts. 
Which can be ordered from your local scrapbook store.
Please note : I think these dies are a very limited collection only available here in Australia

My projects are featured in the latest 
Creative Inspirations Issue #9 magazine
here it the FB link to it below...


Ultimate Crafts NEW Australiana Dies are available now from your local Aussie papercrafting store. You can view our all Australian Issue of Creative Inspiration online or pick up a copy from your local store

Here is my first card
I just love the Gum Leaves ULT157322 & Grass Tree ULT157333

I created a cluster of them and framed around
the edges of my card. I love how the leaves look almost like real leaves.


Here is another card I created with the 
Grass Tree die ULT157333


I just love this one - a vintage old ute/car, Rusty Old Ute ULT15321


And here is my layout "Travel , Explore" with Gum Leaves ULT157322 & Grass Tree ULT15733. I added some glossy accents to the gum nuts, they real pop!!!


Hope you like my projects for today


I also used products from Couture Creations Materials


for all the latest updates from Couture Creations.
Thanks for looking
Cheers Adriana xx:)


Wednesday, July 15, 2015

Australian Scrapbooking Ideas #32

Hi everyone……thanks for stopping by my blog today, hope you are staying warm. The latest issue of 
"Australian Scrapbooking Ideas" Issue #32
is out NOW
I am very excited and fortunate to have 3 projects publishing in this issue.

Today, I will share the other 2 projects here on my blog,
but all the step by step and materials list
is in the magazine. If you missed the first post with my layout, go to this blog post HERE

My commissioned and challenge was to create projects and embellish them with Paper Rosettes. In the magazine I created 2 layouts and wreath.
Today I will share with you all the other one of the layouts and my wreath.
"LOVE"


My Autumn Wreath - all made from flower rosettes 


All the materials list and step by step instructions are in the
ASI magazine Issue 32, This issue has a bonus free gift paper pack
and many inspirational projects from many talented international designers.


Grab yourself a copy at your local scrapbooking shop or newsagent, its Out NOW!!!!

Until next time, 
Cheers xx :) Adriana 

Sunday, July 12, 2015

Father & Son Fishing cards - Couture Creations Cards

Hello there everyone, :)

So glad you stopped by here today.
Today, I am sharing some cards that I have created using some of the new 
release Couture Creation products. 
These are just some very simple and quick
cards with some very quick tips or techniques, using the latest release dies from 
  Couture Creations - KALINI Intricutz dies 

in particular the C0724240 Father & Son Fishing
C0724258 Happy Birthday Title


Gears 1 - C0724261 & Gears 2 - C0724262

 
So here are just 2 very similar cards, using the C0724240 Father & Son Fishing


"DAD" card. 


Using the Father and Son fishing die and also
letters from the C0724258 Happy Birthday Title die
but only cutting out "D" "A" letters and another "D". To spell the word "DAD".
I also cut a Vintage Signs Nesting Dies CO723956 for the background
and a little scrap of the Background Savy - Honeypot C0724088
for the bottom of card along with a Gear die cut.
Using the word "FOR YOU" from the C072402 Hearts Ease Stamp sets.
 I stamped the words and adhered them, also to the bottom of card.

(NOTE : I only cut out the 2 "D" letters and an "A" letter
from the Birthday die cut, for the word "DAD")
This is a very versatile die set, how many other
words do you think you can create with this die
"DAY"
"BIRTH"
"ART"
"BIRD"
"RAD"
"HIT"
"BIRD"
also "TH" at the end of
a number e.g. 5th

and now for my other card 
"For You" 


Again I cut out the C0724240 Father & Son Fishing and also some various gear from the C0724261 Gears 1 & C0724262 Gear 2
I cut the C0724240 Father & Son Fishing die with two different papers from the
Hearts Ease paper collection 6x6 paper pad 


Once cut, I swapped the background insert with each other.


I cut several of the Gears 1 and 2 dies cuts
and inked them with different colour inks and paints.


Stamping the background with the small butterflies from the
I also inked the edges and coloured the butterflies with watercolour paints.


The finished card.


I also created another card with Couture Creations KALINI DIES 
This card I made for this year's CHA displays for Couture Creations.


Couture Creations KALINI DIES 
Co724241 Family is Everything
C0724255 Picket Fence
C0724244 Swing on a tree
C0724248 Twisting Corners
& Vintage Rose papers


Please make sure you add your email address to get the latest newsletters.

Don't forget to join 
Couture Creations FACEBOOK

List of Couture Creations Materials


for all the latest updates from Couture Creations.

Until next time..Thanks for looking
Cheers Adriana xx:)


Tuesday, July 7, 2015

Kaisercraft - Embellishing Ideas with Stamping

Hi there everyone, it's Adriana here today, sharing a few tips and tricks with using stamping for embellishing your cards, layouts and projects. Kaisercraft produce some fabulous textured stamps that can be used on any type of project. They also release a clear stamp set with every paper collection released each month. Today I am going to show you all how you can embellish your cards and layouts, with just a stamp set. I added colour to these the flowers and leaves with watercolour pencils. Also note that you don't have to use Watercolour pencils, you may use KaiserFusion ink pens. The stamp set I am creating with today is from this month's Paper Collection   "Botanica"  CS223 Acrylic 160 x 100mm Clear Stamp.


This wonderful stamp set has 2 word affirmations, 2 leaf and 2 flowers designs.  Today, want to show you how to create cluster of flowers with this excellent stamp set. They are so easy to use and very versatile for any projects, and you can create with them many times over and over again. I created a card, an affirmation mini book and a layout, using this stamp set to create a wonderful unique flower cluster embellishment, a unique background for my layout.

So, firstly here is my card. The cluster of flowers and leaves are from the stamp set and the word sentiment also from the stamp set.

"Friendship" Card by Adriana Bolzon


Next here is my little affirmation book, decorated with the flower cluster on the front and inside the book.

"Mini Affirmation Book" by Adriana Bolzon


And next is my layout, the background is created entirely with the stamp set  and also with other textured stamps from Kaisercraft. Adding a bit of colour with Watercolour pencils, and softness with rustic colour ink pad.

"Jardin du Luxembourg- Paris" layout by Adriana Bolzon


Firstly, to create those lovely clusters of flowers and leaves. Stamp some leaves and flowers on some card stock but in my case I am using Water colour paper because I am using water colour pencils to colour my flowers and leaves. (Please note: it is most important to use a fade resistant waterproof Dye ink pad.)


I coloured them in with watercolour pencils using a water colour pen to blend in the colours together.

Cut these out when dry and ink the edges with a Rustic Colour ink pad

Before inking and after inking the leaves and flowers.

For my card base I used P1873 Leaf paper from the Botanica paper collection.
Distressing the edges a little.


Stamp randomly some Leaves from the stamp set with brown ink pad.


Arranged and adhere some leaves and 


Using foam tape add the stamped and coloured flowers, layering them on top of each other.


Adding some Kindy Glitz Crystallina DMRGCR in the centre of each flower.
some twine and a word sentiment also from the same stamp set.


I used the same technique to create my flowers clusters for the cover of my mini affirmation book.

How to create this mini book…..
Cut 2 strips of P1875 Seed paper from the Botanica paper collection.
30 cm x 12 cm
Scoring paper at 10cm intervals.


Adhering the two strips together, to create an accordion type mini book.

Ink the edges of each page with rustic ink pad.


Decorate with each section with a card ATC from the P1880 Habitat - Botanica paper collection, some collectable tags CT831 Collectables Botanica.


I created and added a flower and leave cluster on the front of mini book
and on top of the tag, inside the book.


And last of all, my layout, in which I created an unique background with the stamp set, adding colour with water colour pencils and water brush pen to blend in the colours. Blending some rustic ink pad colour to the edges.
 I also used the Kaisercraft Textured stamps set
CS876 Crackle
CS752 Script
to add texture to the background.


The finished layout…


Kaisercraft materials used for card, mini book and layout.

"Botanica" Collection
CS223 Clear Stamps
CT831 Collectables
P1880 Habitat paper
P1875 Seed paper
P1893 Leaf paper

Textured stamps
CS876 Crackle
CS752 Script

Kindy Glitz Crystallina DMKGCR


Using a stamp set you can create and enhance your projects, adding a special and different interest to them.  If you have created a layout or card with any of the Kaisercraft stamp sets that are available from Kaisercraft, 
Please add your blog link in the comments below or on the Kaisercraft Facebook page.

We love to see what everyone is creating.. Cheers Adriana XX