
Hello there everyone,
step by step layout created with some of the
fabulous products from Couture Creations.
For my layout today I used, Couture Creations Scallop Circle,
Plain Circle & Victorian Rectangle Nesting Dies and a
Couture Creations Elegance Poetry Embossing folder
a New release embossing folders for April - these are fabulous new releases.
You can created unique background papers with Embossing Folders and Dies,
and of course plain card stock.
All other list of all materials is at the end of this blog post.
Here is my layout, "LOVE You"

Cut a piece of Grey Core'dinations Cardstock 12.5cm x 25 cm.
Place through Elegance Poetry Embossing Folder,
turn it around and emboss the other side,
gently sand embossed image with Couture Creations Sanding Block
Distress edges and then
apply White Picket Fence Distress Stain all over cardstock, leave to dry.

Mount this on a piece of Prima paper with a little border around cardstock,
distress and ink edges, adhere on layout, as shown.
cut in half, ink edges adhere to page, as shown.

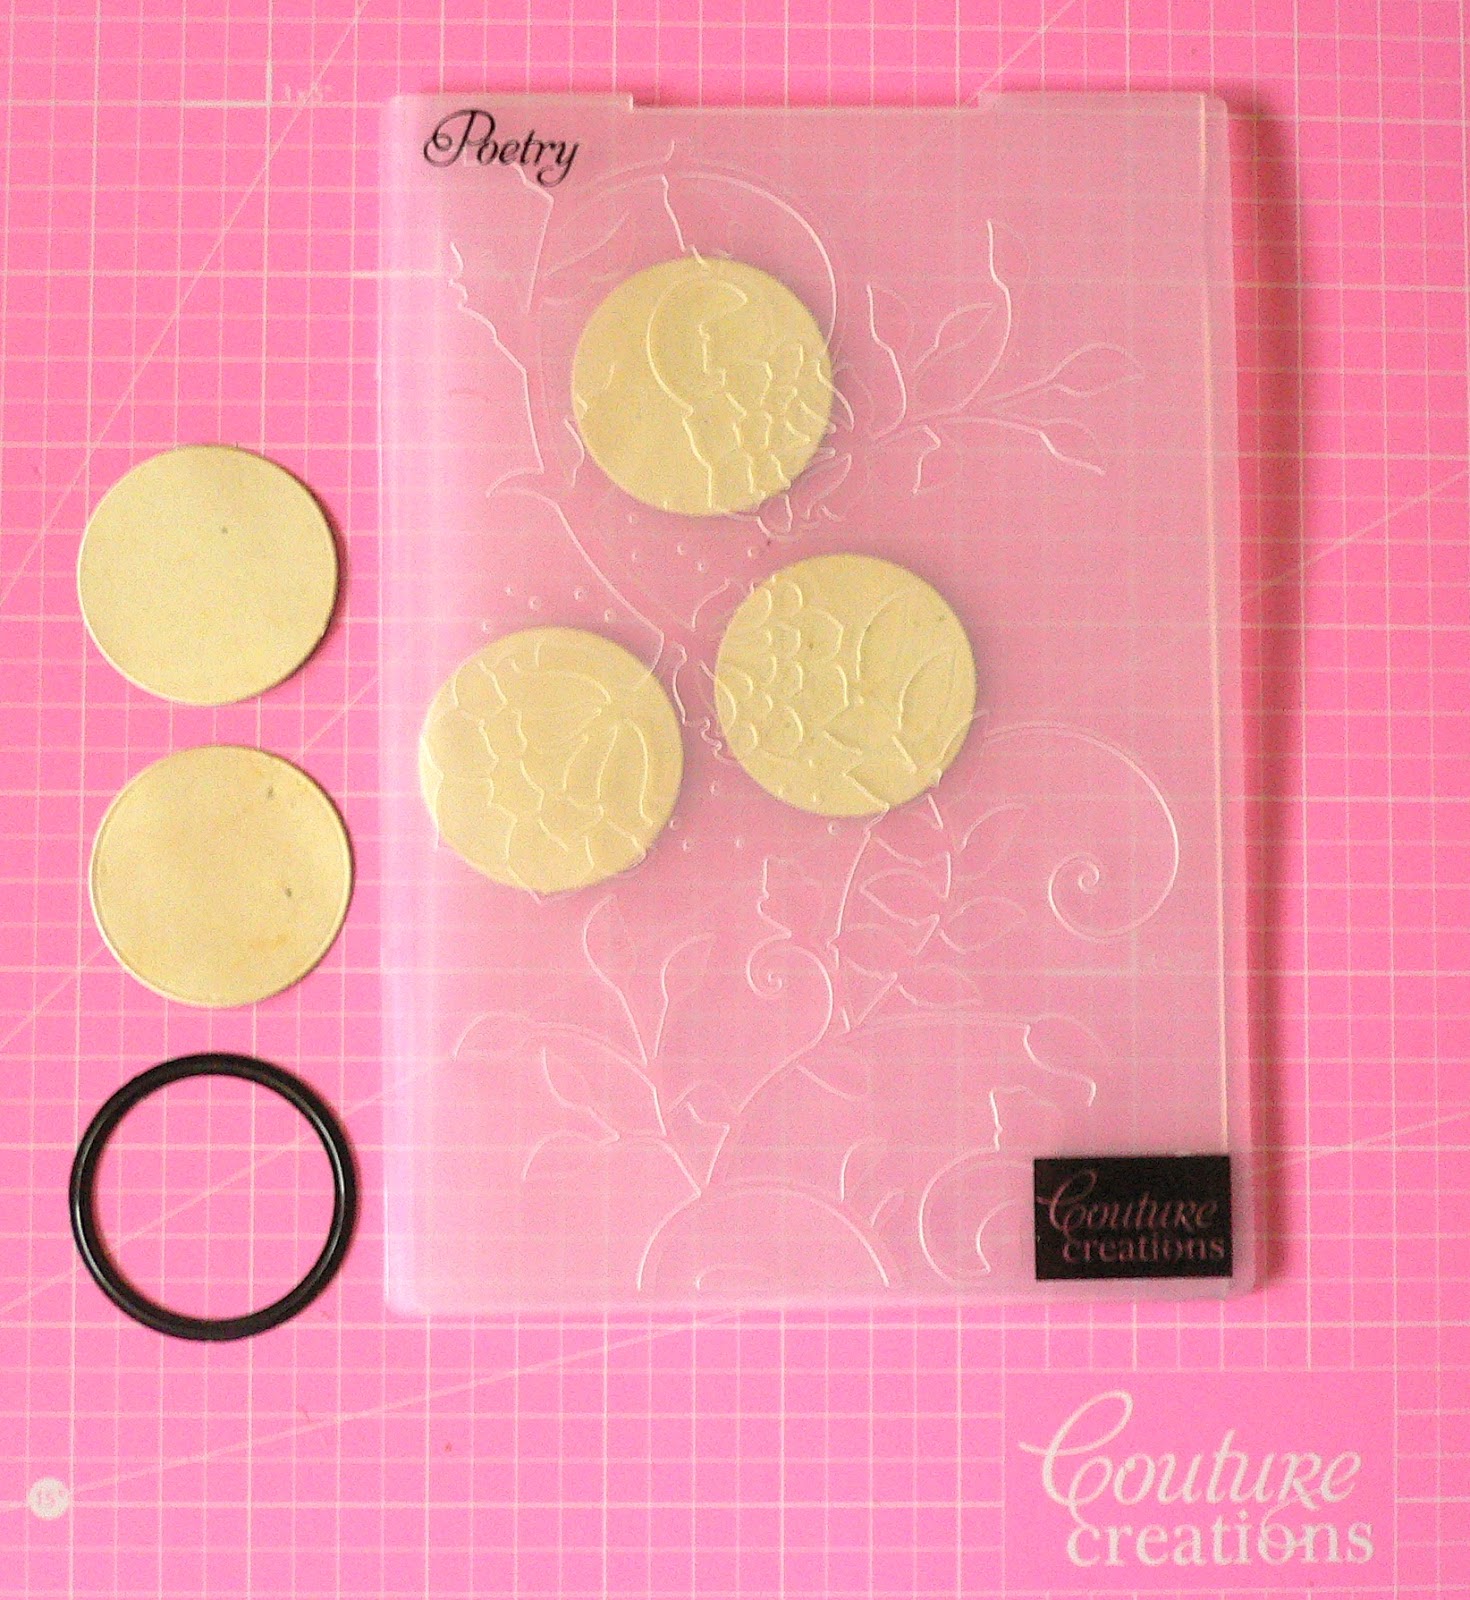
Vintage Photo Distress ink, fold circles in half.
Create a banner with these embossed circles, ribbons and prima flowers,
as shown in photo.

Ink all chipboard words, numbers & butterflies with Burgundy Versa ink pad.
Adhere alphas chipboard onto Victorian Rectangle nesting dies cut outs,
adhere to your page, with double sided foam tape.

Mount your selected photo on Prima paper, distress and ink edges,
have a little border around photo, adhere to middle of page.
Adhere Chipboard butterflies to page on the embossed image.

Adhere a piece of lace under photo and arrange clusters of Prima flowers,
under photo & on Scallop half circles diecuts.

all over page and in the middle of Prima flowers.

I have also stamped the background paper, added brads &
metal elements to my layout.
You can add your own touches as well.

Couture Creations materials
CO723285 Elegance Poetry Embossing Folders
CO723049 Nesting Dies - Victorian Rectangle
CO723041 Nesting Dies - Scallop Circle
CO923040 Nesting Dies - Circle
CO723434 Decorative Die- Moments in Time
Don't forget to join
Couture Creations FACEBOOK
for all the latest updates from Couture Creations
Other materials
Prima Tea Thyme Kersey paper
Prima Tea Thyme Linsey paper
Brown, Grey and Cream Cardstock
Prima flowers
Imaginarium Designs chipboard - mini buttterflies, alphas and words.
ribbons, inks and distressing tool.
I had so much fun creating with these embossing folders, the possibilities are endless........Cheers Adriana XX :)
13 comments:
Adriana, the layout is fantastic. Thank's for great tutorial!
Gorgeous!!! Love the embossed circle banner :)))) The tutorial is fantastic!!! Happy Monday!
truly truly beautiful, and so much glorious detail, great tutorial too Miss Adriana xoxo
Gorgeous layout Adriana, love the 'how to' and the products you used to create, so pretty.
So Lovely Adriana!!! love those embossing folders and the tutorial is fantastic. Take care!
This is beautiful.. I love the embossing and all the dies you have used wonderfully.. I love seeing what the dies look like before I buy them.. some pretty ones used on this layout...
So many pretty little details.
So wonderful Adriana. The embossing and details are amazing.
Great page Adriana, love that embossing and different textures on your page! Beautiful photo and beautiful details too! ;-)
Beautiful. I love the details like the banner and butterflies. So so pretty.
Great step by step - superb bg...looks like I'd better get those embossing folder out to see some light!!!!!
Stunning layout and fabulous how to. Thank you Adriana. ox Marg
Great tutorial ...... Love your work :)
Post a Comment