Today, I wanted to showcase the versatile the Cut, Foil & Emboss dies which are all super easy to create with. The Couture Creations Cut, Foil & Emboss dies are so easy to use and I created 3 different cards in 3 different ways with one set from this Modern Essential collection. There is another collection which has just been released by Couture Creations called the "Esthetica Collection" Cut, foil and emboss dies - and they too can be used in the exactly the same way as my three cards today.
Special Day - card
For my 1st card was created with the Modern Essentials Nesting Lacy Frame cut, foil and emboss die CO726465, with the assistance of the Go Press and Foil machineand Gold Iridescent Triangular Pattern heat activated foil CO726063
INSTRUCTIONS:
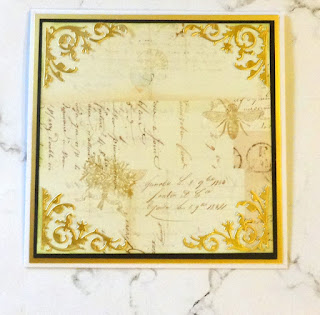
1. Cut Gold Mirror board CO725407 13x 13 cm, secure to front of square card 13.5cm x13.5 cm. Cut Black card stock 12.5cm x 12.5cm secure on top of mirror card.2. Cut Butterfly Garden paper CO726530 - 12cm x 12cm, secure with double sided tape onto front of card.


3. Cut 4 - Butterfly Garden Ornate Corner mini die CO726545 with mirror gold board. Adhere with glue to each corner of card.

4. Foil Nesting Lacy Frames cut, foil and emboss die CO726465, with the assistance of the Go Press and Foil machine
and Gold Iridescent Triangular Pattern heat activated foil CO726063, placing the Metal Conversion plate on the the platform of the Go Press and Foil machine.

INSTRUCTIONS FOR FOILING WITH THE
CUT, FOIL & EMBOSS DIES -
GO PRESS AND FOIL and METAL CONVERSION -
CUT, FOIL & EMBOSS DIES -
GO PRESS AND FOIL and METAL CONVERSION -
just a reminder for those who don't know how to.
Turn machine on
Open Lid
Place Metal Conversion plate on the heat plate of Go Press and foil machine
Place cut foil & emboss die on top of metal conversion plate, face up.
Place cut foil & emboss die on top of metal conversion plate, face up.
Place cut foil colour side down
Place card stock on top
Close lid and let it heat for 30-40 seconds
Wind slowly the platform through and back in your die cutting machine.
5. Adhere foiled frames pieces in the centre of card, as shown in photograph Decorate with flowers and leaves, Cut SPECIAL DAY sentiment with paper and adhere to front of card
***
For my 2nd card - this was created with the left overs foils from the card above. This in turn will create a wonderful background to the card.
1. Cut Pink card stock 13.5 cm x 13.5cm, Ink edges with pigment ink, secure to front of square card 14cm x 14cm.
2. Cut white card stock 12.5cm x 12.5cm,place leftover foils in the centre of card stock and then place another piece of card stock on top.
Then place this underneath your metal conversion plate on the Go Press and foil machine, wait a few moments, then run through die cutting machine.
INSTRUCTIONS WITH THE LEFT OVER FOILING WITH THE
GO PRESS AND FOIL and METAL CONVERSION -
GO PRESS AND FOIL and METAL CONVERSION -
just a reminder on how to do .
Turn machine on
Open Lid
Place Metal Conversion plate on the heat plate of Go Press and foil machine
Place LEFTOVER FOIL IN BETWEEN TWO PIECES OF CARD STOCK
place this sandwich underneath the metal conversion plate.
Place LEFTOVER FOIL IN BETWEEN TWO PIECES OF CARD STOCK
place this sandwich underneath the metal conversion plate.
Place some paper shims on top of go press and foil machine for extra thickness.
Close lid and let it heat for 30-40 seconds
Wind slowly the platform through and back in your die cutting machine.

5. this effect creates a wonderful distress background for my card, I then Decorated the front of cards with flowers and leaves.
Cut SPECIAL DAY sentiment with paper and adhere to front of card.

5. this effect creates a wonderful distress background for my card, I then Decorated the front of cards with flowers and leaves.
Cut SPECIAL DAY sentiment with paper and adhere to front of card.
Enjoy every moment - card
For my last card was created with the Modern Essentials Nesting Lacy Frame cut, foil and emboss die CO726465, once I inked the die with some pigment ink, I placed it with some pink card stock on top of die and then slowly through my die cutting machine.

For my last card was created with the Modern Essentials Nesting Lacy Frame cut, foil and emboss die CO726465, once I inked the die with some pigment ink, I placed it with some pink card stock on top of die and then slowly through my die cutting machine.

Decorating the front of card with flowers and leaves, Foiling sentiment word "Enjoy every moment" with the sentiment from the Gentleman's Emporium collection CO726847 and Go Press and foil machine.
How super easy it is to create with Cut, Foil & Emboss dies. I created three different styled cards with one set of cut, foil and emboss dies.
Nesting Modern Essential - Cut, Foil & emboss die CO726465
Butterfly Garden 12'x12' paper CO726530
Butterfly Garden Ornate Corners mini die (2pce) CO726545
Go Press & Foil Machine CO725032
Metal conversion plate. CO726524
Gold Iridescent Heat activated foil CO726063
Gentleman's Emporium Sentiment hot foil stamps collection CO726847
Gold Mirror board CO725407
Black foam dots CO726429
Special Day mini die
Pink card stock, white card stock, black card stock


No comments:
Post a Comment