Showing posts with label technique go press and foil. Show all posts

Saturday, July 20, 2019

Best Wishes Card - Esthetica collection

Hi everyone welcome back to the Couture Creations blog, Adriana here today with my special BEST WISHES Card - using one of the new 
 ESTHETICA new release Cut, Foil & Emboss Dies. 


CO726758 - Decorative Nesting Peacock Frames.

BEST WISHES card

The new Esthetica Cut, Foil and Emboss die are perfectly for creating frames for cards.
I love the matte gold card stock with the touches of Cyan Heat activated foil, stunning and perfectly foiled and love the colour combo too :)

Today I have step by step instructions for you all - so that you can create the same card.


STEP BY STEP INSTRUCTIONS: 
1. Start with a  5"x7" card base in white card stock.

2. Cut Matte Gold Lines Mirror board CO72540712cm x 17cm, adhering this to the card front.

3. Cut Gentleman's Emporium  paper CO726820 - 11.3cm x 16.3cm, ink around the edges and adhere with double side tape on top of Matte gold lines mirror board card.

4. Foil the Esthetica Nesting Peacock Frame CO726758 with the Go Press and foil machine together with the Metal Conversion plate on the heat platform. Using Cyan iridescent triangular pattern heat activated foil CO726050, onto Matte Gold lines mirror board - Foiling the larger frame first.


5. Foil the smaller inside frame from the Esthetica Nesting Peacock Frame CO726758, this time with the  Gold heat activated foil CO726063 and white card stock.

6. Foil the peacock feather from the Esthetica Nesting Peacock Frame CO726758, this time with the Cyan Iridescent triangular pattern heat activated foil CO726050  and white card stock.

****
INSTRUCTIONS for foiling the CUT, FOIL AND EMBOSS DIES 
 WITH GO PRESS AND FOIL - 
just a reminder for those who don't know how to.

Turn machine on
Open Lid
Place Metal Conversion plate on platform of machine
Place cut, foil and emboss die on top of metal conversion plate
Place cut foil colour side down (gold matte )
Place card stock on top (Black card stock)
Close lid and let it heat for 30-40 seconds
Wind slowly the platform through and back in your die cutting machine.

*****

7. Adhere all foiled pieces on card as shown in photo.


8. Decorate rest of cards with flowers, seam binding ribbon, gemstones and  leave dies.

9. Cut one "Best Wishes" sentiment and adhere to front of card with glue.


Couture Creations List of Materials
ESTHETICA  Decorative Nesting Peacock Frames - CO728758
GENTLEMAN"S EMPORIUM  12'x12' paper  - CO726820 
Go Press & Foil Machine - CO725032
Metal conversion plate  - CO725818
Gold Iridescent Heat activated foil - CO726063
Cyan iridescent triangular pattern heat activated foil  - CO726050
Gold matte lines mirror board - CO725407
5'x7' white card stock 
Black foam dots CO726429

***

Thanks for stopping by,
Cheers and big hugs
Adriana XX


Friday, May 31, 2019

Special cards 3 ways - technique

Hi everyone Adriana here today, and thanks for stopping by here on  
the Couture Creations blog.

Today, I wanted to showcase the versatile the Cut, Foil & Emboss dies which are all super easy to create with. The Couture Creations Cut, Foil & Emboss dies are so easy to use and I created 3 different cards in 3 different ways with one set from this Modern  Essential collection. There is another collection which has just been released by Couture Creations  called the "Esthetica Collection" Cut, foil and emboss dies - and they too can be used in the exactly the same way as my three cards today.


Modern Essentials Nesting Lacy Frame cut, foil and emboss die 
CO726465, it is a three piece set. 


Special Day - card 
For my 1st card was created with the Modern Essentials Nesting Lacy Frame cut, foil and emboss die CO726465, with the assistance of the Go Press and Foil machine
and Gold Iridescent Triangular Pattern heat activated foil CO726063

INSTRUCTIONS:
1. Cut Gold Mirror board CO725407 13x 13 cm, secure to front of square card 13.5cm x13.5 cm. Cut Black card stock 12.5cm x 12.5cm secure on top of mirror card.

2. Cut Butterfly Garden paper CO726530 - 12cm x 12cm, secure with double sided tape onto front of card.


3. Cut 4 - Butterfly Garden Ornate Corner mini die CO726545 with mirror gold board. Adhere with glue to each corner of card.


4. Foil Nesting Lacy Frames cut, foil and emboss die CO726465, with the assistance of the Go Press and Foil machine
and Gold Iridescent Triangular Pattern heat activated foil CO726063, placing the Metal Conversion plate on the the platform of the Go Press and Foil machine.


INSTRUCTIONS FOR FOILING WITH THE
CUT, FOIL & EMBOSS DIES - 
GO PRESS AND FOIL and METAL CONVERSION  - 
just a reminder for those who don't know how to.

Turn machine on
Open Lid
Place Metal Conversion plate on the heat plate of Go Press and foil machine
Place cut foil & emboss die on top of metal conversion plate, face up.
Place cut foil colour side down
Place card stock on top
Close lid and let it heat for 30-40 seconds
Wind slowly the platform through and back in your die cutting machine.


5. Adhere foiled frames pieces in the centre of card, as shown in photograph Decorate with flowers and leaves, Cut SPECIAL DAY sentiment with paper and adhere to front of card
***

For my 2nd card - this was created with the left overs foils from the card above. This in turn will create a wonderful background to the card.


INSTRUCTIONS:
1. Cut Pink card stock  13.5 cm x 13.5cm, Ink edges with pigment ink, secure to front of square card 14cm x 14cm. 

2. Cut white card stock 12.5cm x 12.5cm,place leftover foils in the centre of card stock and then place another piece of card stock on top.
Then place this underneath your metal conversion plate on the Go Press and foil machine, wait a few moments, then run through die cutting machine.


INSTRUCTIONS WITH THE LEFT OVER FOILING WITH THE
GO PRESS AND FOIL and METAL CONVERSION  - 
just a reminder on how to do .

Turn machine on
Open Lid
Place Metal Conversion plate on the heat plate of Go Press and foil machine
Place LEFTOVER FOIL IN BETWEEN TWO PIECES OF CARD STOCK
place this sandwich underneath the metal conversion plate.
Place some paper shims on top of go press and foil machine for extra thickness.
Close lid and let it heat for 30-40 seconds
Wind slowly the platform through and back in your die cutting machine.


5. this effect creates a wonderful distress background for my card, I then Decorated the front of cards with flowers and leaves. 
Cut SPECIAL DAY sentiment with paper and adhere to front of card.


Enjoy every moment - card
For my last card was created with the Modern Essentials Nesting Lacy Frame cut, foil and emboss die CO726465, once I inked the die with some pigment ink, I placed it with some pink card stock on top of die and then slowly through my die cutting machine.


Decorating the front of card with flowers and leaves, Foiling sentiment word "Enjoy every moment" with the sentiment from the Gentleman's Emporium collection CO726847 and Go Press and foil machine.

How super easy it is to create with Cut, Foil & Emboss dies. I created three different styled cards with one set of cut, foil and emboss dies.


I also have made a short video showing these techniques


HERE is the link

https://youtu.be/6Pmgegf5gNA

Couture Creations List of Materials


 Nesting Modern Essential  - Cut, Foil & emboss die CO726465
Butterfly Garden 12'x12' paper CO726530
Butterfly Garden Ornate Corners mini die (2pce) CO726545
Go Press & Foil Machine CO725032
Metal conversion plate. CO726524
Gold Iridescent Heat activated foil CO726063
Gentleman's Emporium Sentiment hot foil stamps collection CO726847 
Gold Mirror board CO725407
Black foam dots CO726429
Special Day mini die 
Pink card stock, white card stock, black card stock
***
Thanks for stopping by, 
be sure to ask for this collection from your local 
Papercraft store.....all available now

Cheers and big hugs
Adriana XX


Friday, February 1, 2019

Shadow Framed Project

Hello everyone, today I wanted to share a special off the page project, created with one of the Couture Creations  "Modern Essentials" Cut, foil and emboss die frames, in particular the Nesting Bracket frames CO726459. Using this nesting frame to create a special effect of illusion of a shadow box frame.

These dies can be used with the Go Press and Foil Machine to achieve the foiled edges around the shape, but they can also be used in your normal manual die cutting machine. For my project, once I cut the dies out I inked around the edges of the left overs from the nesting dies - then layered them on top of
each other. This creates a shadow effect illusion. 

I have set my project inside a simple white frame - I hope you like...
I then foiled some of the foliages with the 

Lavish Ballroom collection  "Sweeping Botanicals" CO725909 and
Lavish Ballroom "Young Stems" CO725904
Adding some diecut flowers from the C'est Le Vie collection...
Using another cut and foil die the 
Nouveau Cut, Foil "Hanging Cage" CO725846, 
this time I just inked the die with an ink pad and ran it through the die cutting machine. 


Modern Essentials 
CO726459 - Nesting Bracket frames 


Couture Creations List of Materials
MODERN ESSENTIALS - Cut, Foil & emboss Nesting Brackets CO726459
Lavish Ballroom collection  "Sweeping Botanicals" CO725909 
Lavish Ballroom "Young Stems" CO725904
Nouveau Cut, Foil and emboss - "Hanging Cage" CO725846
C'est La Vie Geraniums Layered CO725765 
Go Press & Foil Machine CO725032
Vintage Gold heat activated foil CO725355

***

Thanks for stopping by, 
Cheers and big hugs


Adriana XX


Sunday, January 20, 2019

Thank You - Easel card - Modern Essentials Dies - Couture Creations

Hello everyone, Welcome back, today I have created another card using the new release Couture Creations
  "Modern Essentials"     -  Cut, foil and emboss dies. 

This time I created an Easel card using one of the Nesting Frames, in particular the Cut Foil and Emboss Nesting Bracket frames CO726459.
I just love how these dies can be used just with your normal die cutting machine, with no foiling. This shape is so versatile as well.


CO726459 Nesting Bracket Frames Cut,foil & emboss die.


I also created this panel using a die with the Go Press and Foil machine and of course, gold foil. The end result is an outline of the die design onto the card stock.


Couture Creations List of Materials
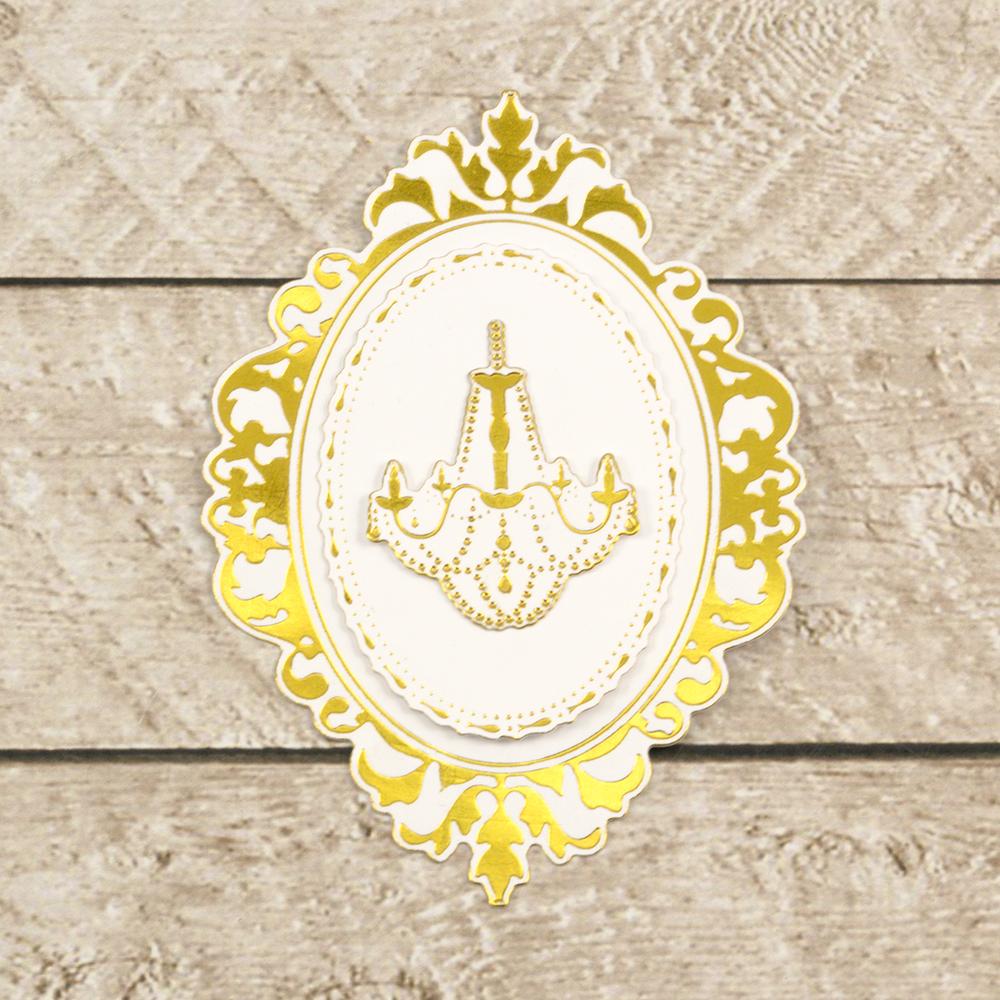
MODERN ESSENTIALS - Cut, Foil & emboss Chandelier dies CO726464
MODERN ESSENTIALS - Cut, Foil & emboss Nesting Bracket dies CO726459
Lavish Ballroom - Cut, foil and Emboss CO725904
Thank You - Hot foil stamp sentiment CO725822
Le Petit Jardin - Bending Branches CO725932
C'est le Vie - Geraniums layered die CO725765
Go Press & Foil Machine C0725032
Vintage Gold heat activated foil - CO725355
Gold Yellow Heat Activated foil - CO725354
Other: flowers, card-stock, embellishment.
***

Thanks for stopping by, 
Cheers and big hugs


Adriana XX


Sunday, December 30, 2018

You are Lovely - cards - Go Press and foil cards

Hi Bloggers, while it has been a bit warmer outside at the moment - it's a perfectly nice and cool inside my craft room, with the aircon on :) 
thanks for aircon :)

I created two cards showcasing the embossing folder technique using the GoPress and Foil machine, while the other card is showing the new Modern Essential nesting  Cut, Foil and emboss dies.


I just love these Nesting dies, the one I worked with today is called 
Modern Essentials - 
Cut, Foil and emboss decorative Nesting Chandelier frames die
CO726464


MODERN ESSENTIALS - Cut, Foil & Emboss Nesting die rectangle  CO726456


MODERN ESSENTIALS - Cut, Foil & Emboss Nesting die ovals CO726454


Couture Creations List of Materials

Embossing folder - assorted
MODERN ESSENTIALS - Cut, Foil & Emboss Nesting die CO726464
MODERN ESSENTIALS - Cut, Foil & Emboss Nesting die ovals CO726454
MODERN ESSENTIALS - Cut, Foil & Emboss Nesting die rectangle  CO726456
Go Press & Foil Machine C0725032
Rose Gold Iridescent heat activated foil - CO725694
Gold Foil Iridescent Triangular Pattern heat activated foil -  CO726063
***

Thanks for stopping by, 

Until Next time, take care. :)

Adriana XX


Friday, December 14, 2018

Merry Christmas Card - Modern Essential Dies

Hello everyone, Adriana here today with my last christmas card post for this year. I have created a few Christmas Cards this year using papers and dies from the Couture Creations HIGHLAND CHRISTMAS, and I couldn't resist using the soon to be released "Modern Essentials" cut, foil and emboss die frames.

Oh wow!!! these nesting dies frames can foil, cut and emboss at the same time but the most excellent part is that if you don't have a foiling machine you can still use these nesting dies with your die cutting machine. Oh the possibilities are unless :)

It is a three piece set...  here is my special Merry Christmas card


So loving the Rose Gold Foiling ....


I just love these Nesting dies, the one I worked with today is called 
Modern Essentials - 
Cut, Foil and emboss decorative Nesting Chandelier frames die
CO726464


Couture Creations List of Materials
HIGHLAND CHRISTMAS 6X6 paper pad CO726273
HIGHLAND CHRISTMAS Merry Christmas die - CO726410
LE PETIT JARDIN Evening Branch Mini die. CO725937
MODERN ESSENTIALS - Cut, Foil & emboss Nesting Chandelier dies
CO726464
Matte Bronze Mirror Board CO725408
Go Press & Foil Machine C0725032
Rose Gold Iridescent heat activated foil - CO725694

***

Thanks for stopping by, 
Cheers and big hugs
Merry Christmas to you and your family.
Wishing you a very festive day with your family
Until Next time, take care. :)

Adriana XX